How to set up expense categories and vendors
Written By Lauri Eurén
Last updated 3 months ago
This article shows admins how to manage the data behind Operating's expense system: the Expense categories users pick from when entering line items, and the Vendors they can attribute costs to. Configure these once and they're available throughout the organization.
Before you begin
These pages live under settings. You need Expense editing permissions for your organization.
Expense tracking must be enabled for your organization.
Set up Expense categories
Expense categories classify line items on each Expense. Operating ships with a curated default set, and admins can rename, customize, archive, or add categories.
Open the categories page
Go to Settings → Expenses → Categories. The Expense Categories page lists every active category. Archived categories remain accessible from the same view.
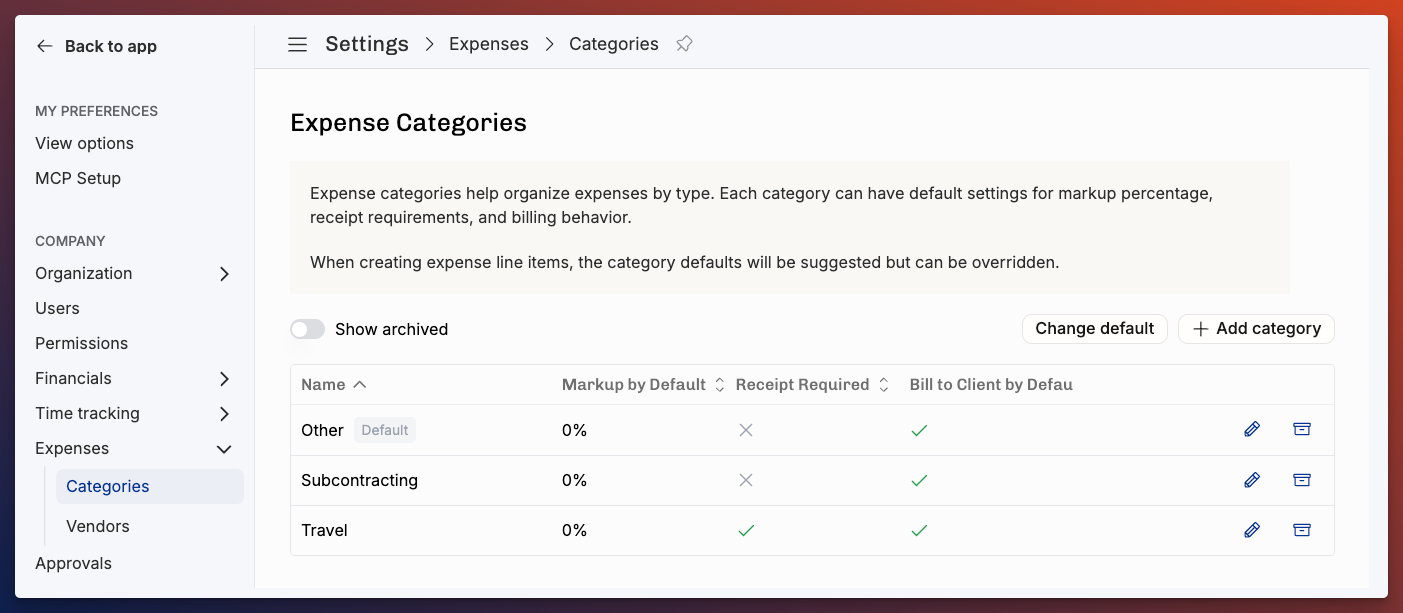
Add or edit a category
To add a new category, click Add category. The Create Expense Category dialog opens.
To edit an existing one, click the pencil icon on its row. The Edit Expense Category dialog opens.
In either dialog, fill in:
Name — the user-facing label of the category (for example, "Travel" or "Subcontractors").
Default Markup (%) — the markup applied to line items in this category when calculating the Amount to invoice from the line item's cost.
Receipt Required — when on, an Expense with at least one line item in this category can't be saved unless a receipt is attached to the Expense.
Bill to Client by Default — when on, line items in this category default to billable. Users can still toggle the billable flag off per line.
Click Create to save a new category, Save to save edits, or Cancel to discard.
Archive or delete a category
Archive — click the archive icon on a category's row, then confirm in the Archive expense category dialog. Archived categories stop appearing in pickers when entering new Expenses; historical Expenses keep their category reference. Archived categories can be brought back by clicking the unarchive icon.
Delete — first archive the category, then click the trash icon on the archived row and confirm in the Delete expense category dialog. Deletion is permanent. A category can't be deleted if it's marked as the organization's default (shown by a "Default" badge in the active list), or if it's the only remaining active category — Operating blocks both to keep the system functional.
Set up Vendors
A Vendor is a supplier or merchant a cost is attributed to. Vendors are optional metadata on an Expense, but a clean Vendor list makes spend-by-Vendor reporting more useful.
Open the Vendors page
Go to Settings → Expenses → Vendors. The Vendors page lists every active Vendor. Archived Vendors remain accessible from the same view.
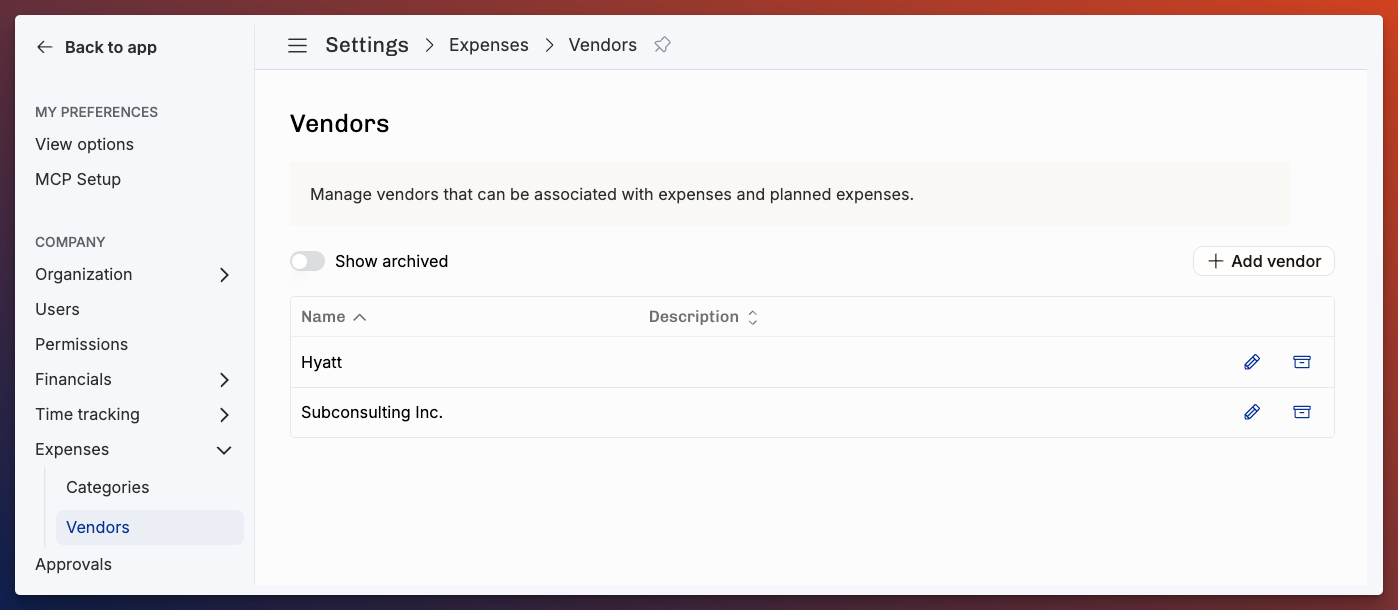
Add or edit a Vendor
To add a new Vendor, click Add vendor. The Create Vendor dialog opens.
To edit an existing one, click the pencil icon on its row. The Edit Vendor dialog opens.
In either dialog, fill in:
Name — the Vendor's name. Must be unique across the organization.
Description — optional notes about the Vendor.
Click Create to save a new Vendor, Save for edits, or Cancel to discard.
Vendors can also be created inline while entering an Expense — typing a new name in the Vendor field marks it as new and creates the Vendor when the Expense is saved. Use the settings page when you want to add or edit Vendors in bulk, or to set or update a Description.
Archive or delete a Vendor
Archive — click the archive icon on a Vendor's row, then confirm in the Archive vendor dialog. Archived Vendors stop appearing in pickers, but their references on existing Expenses stay intact. Archived Vendors can be brought back by clicking the unarchive icon.
Delete — first archive the Vendor, then click the trash icon on the archived row and confirm in the Delete vendor dialog. A Vendor can be deleted only if no Expenses (or Planned expenses) reference it. If references exist, the dialog explains that you need to archive instead.